Gray Background & Vignetting Removed!
- Jennifer Gillen

- Jul 29, 2022
- 2 min read
One of the most difficult things about painting on a white background is photography. It's important to have good photographs for submitting work to exhibitions and galleries. The most common problem with photography is the white of the paper seems to never turn out white. There are all kinds of advice and articles online about photographing paintings in the right light. Everything from photographing outdoors to using a light kit in a darkened room is suggested.
If you're struggling with gray photos, here's a solution that I just learned. I use a basic set-up of some photography lights, diffusing umbrellas and a digital camera on a tripod. My aperture is set to f/5.6 (in aperture priority mode) with a shutter speed of 1/50 sec and ISO 100. My camera's automatic pattern metering and preset white balance work fine for this. In the past I tried setting up a custom white balance but that proved to be a waste of time.
What I learned is that most of the gray and vignetting that occurs on photos can be corrected in Photoshop. For photographers and designers this is probably so basic, but as an artist I found it amazing. The lens of my camera causes a circle of light distortion in the form of a dark vignette on the white edges of my painting photo. Once that is removed in Photoshop it's just a matter of adjusting the exposure until it's no longer gray. The dropper tool is a good way to check the white to see if any gray remains.

ORIGINAL PHOTO: Too dark. Whites aren't white. I probably should have changed the exposure when photographing, but this can be fixed.

POORLY BRIGHTENED PHOTO: Too saturated. I tried to brighten the photo to lift the white and added saturation to make up for the washed out areas. The vignetting in the corners is caused by lens distortion. It can't be removed by just adjusting the brightness.
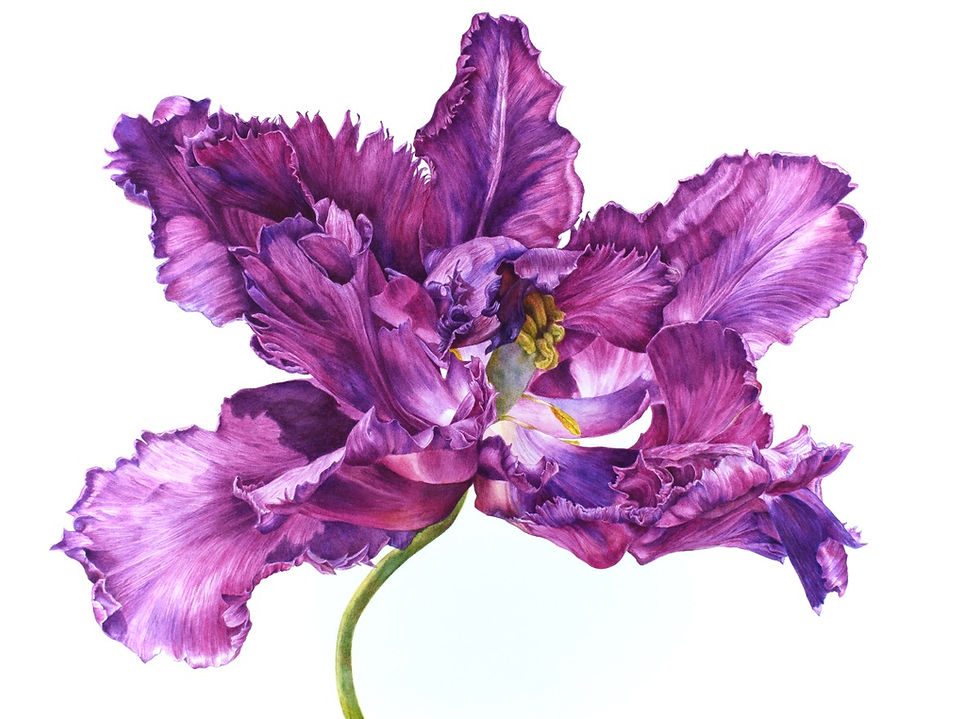
JUST RIGHT: The vignette was removed using the Lens Correction filter in Photoshop. Then the gray background was fixed using the Exposure adjustment in Photoshop. It was that simple. No saturation and contrast needed to be added. Best of all, the colors are vibrant for printing and the white of the paper is actually white without doing a background removal.
I hope this helps my artist friends who might be struggling with gray backgrounds in their photos. The full disclaimer is that I am not a photographer or graphic designer; just an artist, clicking around and learning new things.


Comments